
How to Train for Rock Climbing
If you are looking for a plan to get stronger while for avoiding injury, you came to the right place. Rock climbing is hard on the body, so knowing when to push harder and when to hold back is very important. This guide will get you started on climbing stronger by training how it counts.
The Plan
The workout plan will be based on working out 4 days a week. This will give you optimal time for muscle growth and recovery time. Check out this Guide to Climbing Supplements for a quick training boost.
When looking in each subsection there will be a table that specifies the day each workout should take place on (i.e. Day 1). This structure will keep your muscles guessing and your mind occupied.
Each session should begin with 10-15 minutes of stretching and basic warm-ups. This will be followed by a 30-45 minute climbing session. During this session, try to climb a few grades under your limit. For example, if you climb at a V5 level, then only work on V3 and under. Focus on technique and form. Training with technique will help amplify your strength gains.
Finger Training
Fingers or grip strength may be the single most important part of a climber’s physical attributes. Without a strong grip, you will only be able to climb on jugs. Fingers are also one of the most common injuries in climbers. This is often due to improper training or technique.
Before seriously training your fingers, you must be completely warmed up and rested from the previous workout. If you ever feel a tweak in your fingers or hands, it’s better to be safe and take a break. For more reading, take a look at this finger/tendon injury prevention guide.
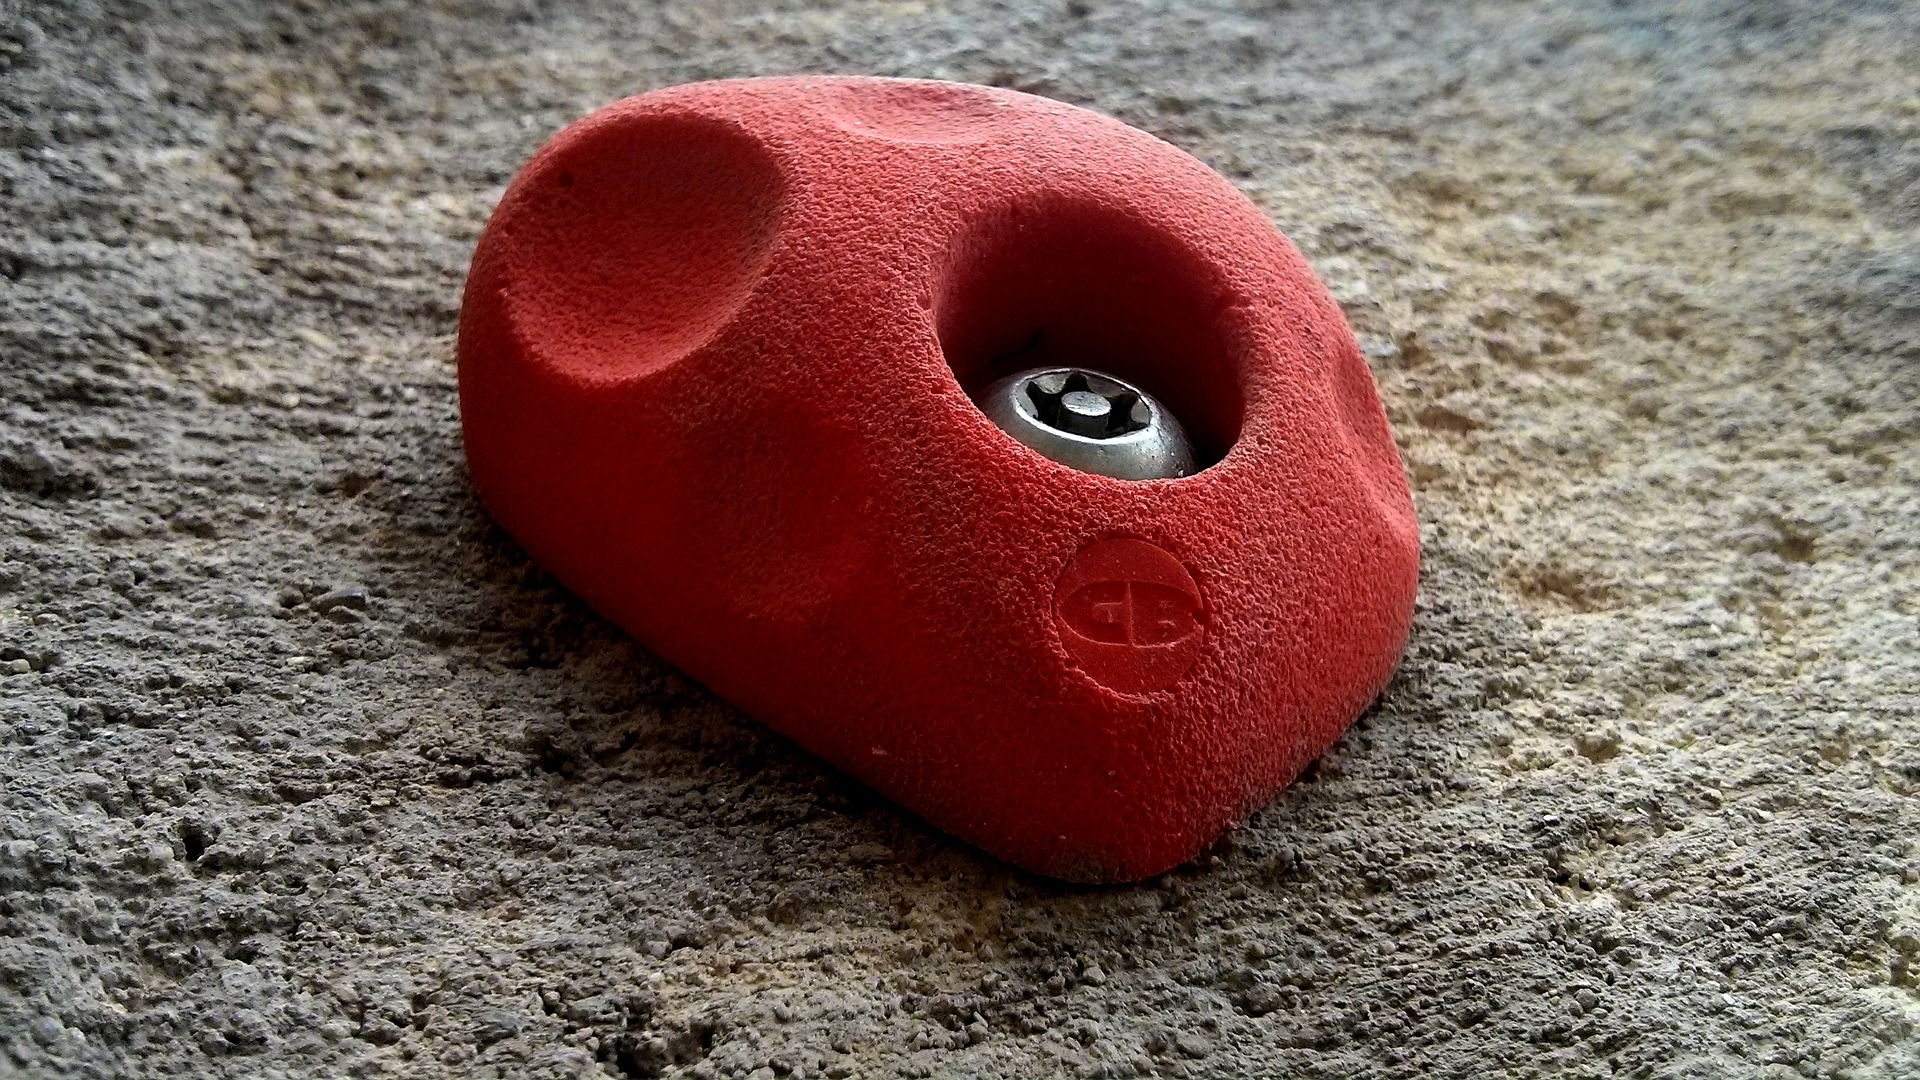
The Tools
Click the Following Links to See Recommendation for Home Workout Options
- Finger Exerciser (A must have for climbers!)
- Campus Board
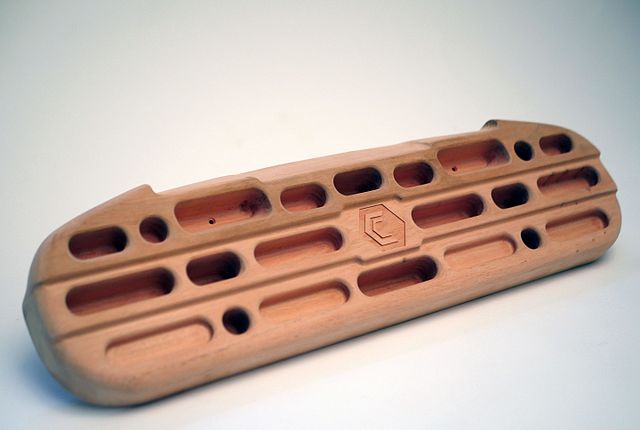
- Hang Board
The Workout
Grip Strength Trainer
A grip strength trainer can be found for under $20 and is an invaluable investment for a climber. This simple tool can be used in class, on the commute to work, or while watching TV. It keeps the fingers limber and the blood flowing to the tendons. These trainers will not make you go from a V2 to a V10 climber overnight, but they will keep your finger in shape if you miss a few days at the gym. Try to limit your sessions to under 10 mins to avoid overuse and completely avoid them after training campus board in the gym for at least a day afterward.
Campus/Hang Board
This exercise is to focus on training your fingers to hold both crimps and slopers. For this exercise, you will need to find a crimp and a sloping edge that you can dead hang* from for approximately 10-15 seconds. For example, use different size campus rungs or fingerboard holds to find something that works for you. One complete set contains a 10-15 second hang from the crimp, a 1-minute rest, and a 10-15 second hang from the sloping edge.
*Make sure to engage your lats and back muscles while hanging to keep your shoulder in good form.
The Goal
While performing each set of dead hangs, be sure to rest 3 minutes in between sets. This will allow your fingers to recover and avoid potential injury. Make sure to rest at least 1 day after training finger before climbing hard again.
If you are a more advanced climber, you may not think this is enough to increase grip strength but doing anymore will lead to over-training. The body must have time to recover in order to get stronger. Stick with this regimen for 4 weeks.
Note: All finger training should be done after a normal gym session while you are still warm.
| Day 1 | Day 3 | |
| Week 1 | 1 Set of Dead Hangs | 2 Set of Dead Hangs |
| Week 2 | 2 Set of Dead Hangs | 2 Set of Dead Hangs |
| Week 3 | 3 Set of Dead Hangs | 4 Set of Dead Hangs |
| Week 4 | 5 Set of Dead Hangs | 5 Set of Dead Hangs |
Forearm Strength Training
Do you ever find yourself looking at your arms after a climbing session and thinking your forearms are about to explode? If so, you are probably experiencing what climbers call “pump.” This is where you have used all of the energy in your muscles. This is a huge factor when you are working hard on a project and can really hold you back. Whether you are a rope climber or boulderer, this is going to affect your climbing. Out of all of the factors that can hold you back (such as finger strength, mental strength, or technique), pump is going to be the easiest one to fix. Here is one simple training regimen to do to get ready for your project.
The Tools
Click the Following Links to See Recommendation for Home Workout Options
- Hang board
- Sports Timer or a Phone
- Chair (something to rest your feet on)
- Music (stoke booster)
The Workout
The main concept of this workout is to hang from the hang board for a long period to you get your forearms ready to fight off the pump. This may sound pointless, but this is going to simulate a long climb. This will strengthen your forearms immensely without putting stress on the rest of your body.
Set up the chair in front of the hang board so that if you hang and put your feet up on the chair it will simulate being on an overhanging wall. You want to make sure you are not putting all your weight on the chair, but enough to make you comfortable to hang.
Start a timer and begin to hang. You are going to be fighting the pump as much as you can. Get used to hanging on one arm and shaking out the other. Try to move around on the board from jugs to slopers to crimps. Once your forearms feel like they cannot hold on any longer double the amount of time you have been hanging (reference the table below). It will be quite a fight, but you can do it.
| Pump Time (Feeling the Burn) | Goal Time (Failure) |
| 2 mins | 4 mins |
| 3 mins | 6 mins |
| 4 mins | 8 mins |
| 5 mins | 10 mins |
The Goal
When you start, you might feel comfortable hanging for 3 minutes and then end up hanging for 6 minutes. The goal is to make it to 10 minutes. If you can fight off the pump for about 10 minutes, this will help you to climb around 20 boulder problems, and around an 80’ rope climb.
| Day 2 | Day 4 | |
| Week 1 | 1 Set to Pump Time | 1 Set to Goal Time (Failure) |
| Week 2 | 2 Sets to Pump Time | 1 Set to Pump Time 1 Set to Goal Time (Failure) |
| Week 3 | 2 Sets to Pump Time | 2 Sets to Pump Time 1 Set to Goal Time (Failure) |
| Week 4 | 3 Sets to Pump Time | 1 Sets to Pump Time 2 Set to Goal Time (Failure) |
Upper Body Training
Upper body strength refers to the arms and shoulders. These muscles are what allow you to hold lock-offs or do hard dead point moves. This is very important for climbing and cannot be overlooked.
To train for this, many people choose to just do pull-ups on jugs and a few sets of push-ups here and there. This is not enough to make a real difference when climbing actually problems/routes. Strengthening your upper body for climbing requires simulating climbing moves in your training.
The Tools
Click the Following Links to See Recommendation for Home Workout Options
- Hang Board or Pull-up Bar
- Weight Vest or Elastic Band (for adding or subtracting resistance)
The Workout
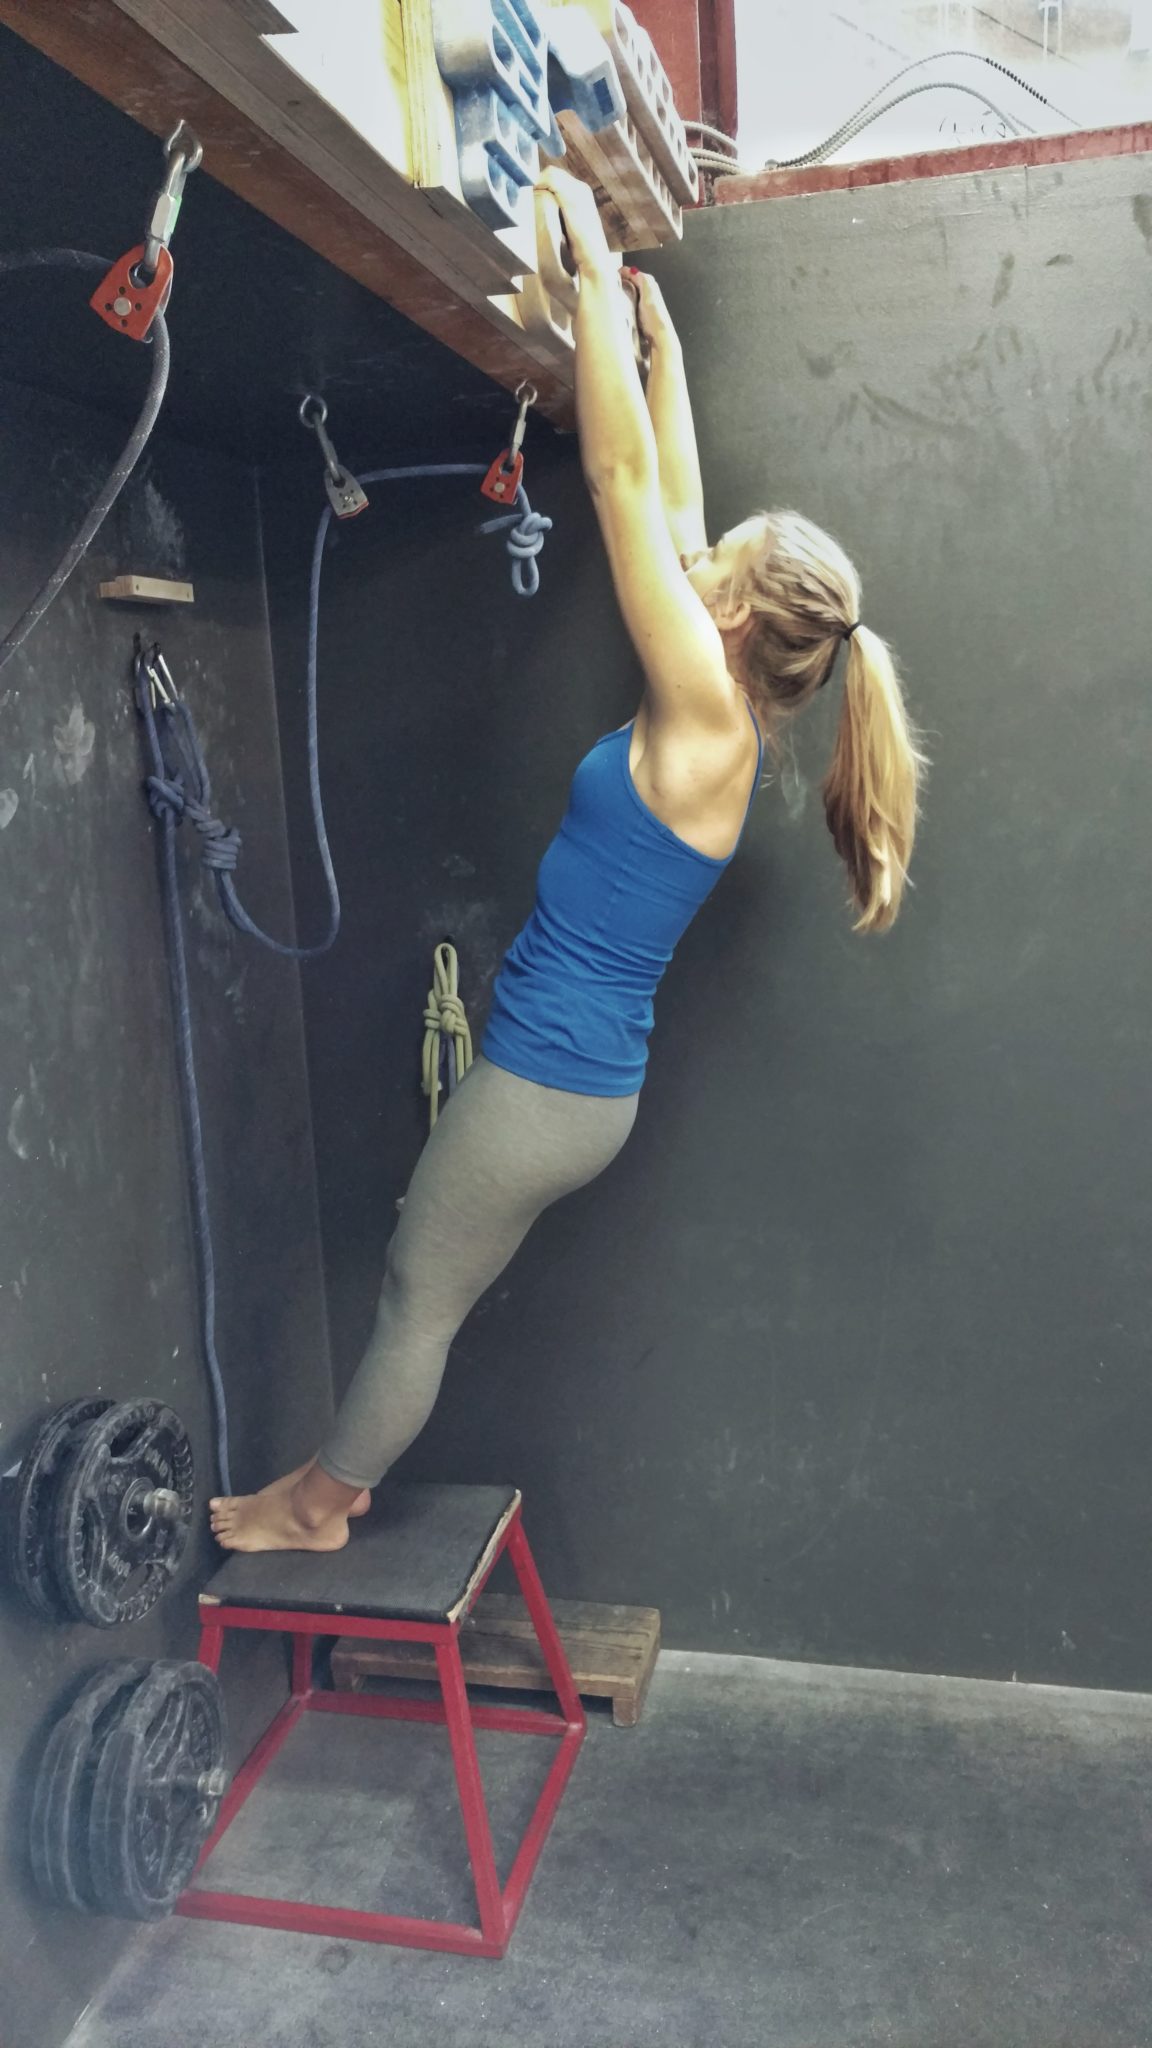
For this routine, you will need to be warmed up. Start the exercise by finding a hang board with a variety of different holds. This exercise will have 3 parts to each set.
First, grab the jug holds on the hang board and do the allotted number of pull-ups for the day you are on. Rest 60 seconds.

Credit: WorkoutLabs
Second, do 20 push-ups on the floor. Keep good form during these push-ups. 20 reps is a target if you cannot do that many then go until failure. Rest 60 seconds.

Credit: WorkoutLabs
Lastly, Find a crimp and a sloping edge (much like the finger exercise) that you can dead hang from for approximately 60 seconds. So it should somewhat comfortable to hold static, but hard to pull on. This will take some experimentation to get it right. Once you picked the hold start to do the allotted amount of pull-ups for that day. This will alternate between crimp and sloping edge.
Make sure you are doing your reps like the guys at Calisthenic Movement are in the following video. Check out more of their stuff if you get a chance, they really know what they are doing.
If you do it wrong you are only cheating yourself.
The Goal
To strengthen your arms we will be ramping up the exercise gradually during the 4 weeks. If you feel like you can do more in the first few week, try to resist (and make sure you have good form, no kipping). If it is too hard to do this many sets try wrapping the elastic band around the bar and stepping on it to decrease resistance. The idea is to stimulate your muscles to make maximum gains. On the sets that say “To Failure” do as many reps are possible for failing. This will ensure that all the fibers in your arms are being triggered.
| Day 1 | Day 2 | Day 4 | |
| Week 1 | 10 Pull-ups on Jugs 20 Push-ups 10 Pulls ups on Sloping Edge |
10 Pull-ups on Jugs 20 Push-ups 10 Pulls ups on Crimp |
12 Pull-ups on Jugs 20 Push-ups Pulls ups on Sloping Edge To Failure |
| Week 2 | 10 Pull-ups on Jugs 20 Push-ups 10 Pulls ups on Crimp |
12 Pull-ups on Jugs 20 Push-ups 12 Pulls ups on Sloping Edge |
12 Pull-ups on Jugs 20 Push-ups Pulls ups on Crimp To Failure |
| Week 3 | 12 Pull-ups on Jugs 20 Push-ups 12 Pulls ups on Sloping Edge |
15 Pull-ups on Jugs 20 Push-ups 15 Pulls ups on Crimp |
15 Pull-ups on Jugs 20 Push-ups Pulls ups on Sloping Edge To Failure |
| Week 4 | 15 Pull-ups on Jugs 20 Push-ups 15 Pulls ups on Crimp |
18 Pull-ups on Jugs 20 Push-ups 18 Pulls ups on Sloping Edge |
15 Pull-ups on Jugs 20 Push-ups Pulls ups on Crimp To Failure |
Core Strengthening
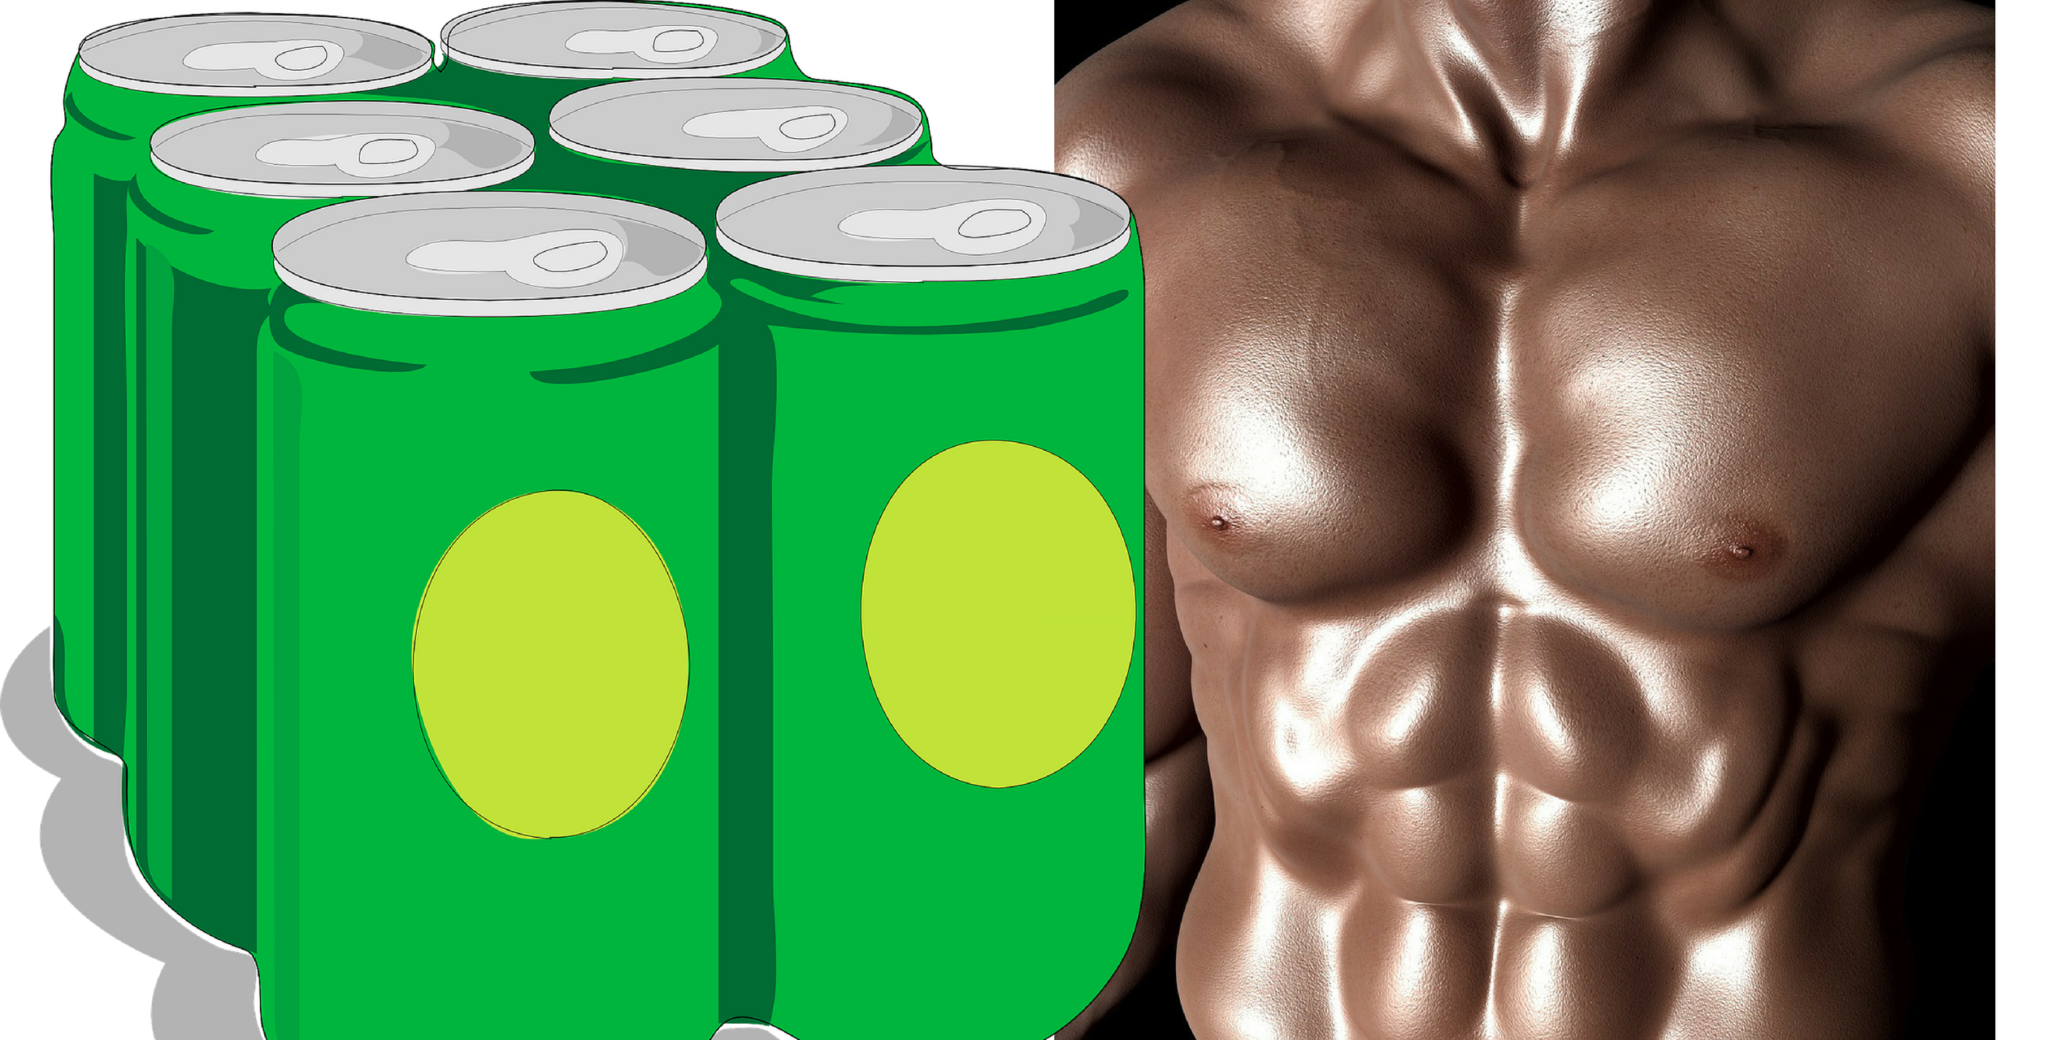
Without a strong core, you might need to down a six pack to really enjoy climbing. (Bad) joking aside, a strong core is what allows you to transfer power from your upper body to your legs and visa-verse. It’s the glue that holds everything together. To make hard moves you will need to exert a lot of core strength to stay on the wall. The following exercises will help you get a start on getting that six-pack, or more importantly, that V6.
Check out this post for a Core Specific Workout.
The Tools
Click the Following Links to See Recommendation for Home Workout Options
The Workout
The internet is flooded with ab exercises and workout plans. It’s hard to pick and choose what is good and what is garbage. I will try to keep this simple by only picking the top 4 exercises for this workout plan. If you would like to add more or try different variations feel free. The trick with your core is to stay motivated.
Excercise 1 – Hanging Leg Raises
For this one, you need to find something that you can hang from with straight arms while having your feet off the ground. Start by hanging from the bar and then lifting your feet out to a horizontal position. Make sure you have a controlled and balanced movement. Slowly let your legs come back down to the resting position. An easier version of this is done with bent knees.
This exercise will help you keep your feet on the wall during roof moves and help you keep control when cutting feet.

Credit: WorkoutLabs
Excercise 2 – Plank
Planks are very simple and also very difficult. Form is everything for planks. You must keep your back straight and avoid bouncing around or fidgeting. Planks will help increase your core’s endurance. This will help during long climbs and crux sections.

Credit: WorkoutLabs
Excercise 3 – Bicycles
Bicycles hit the oblique muscles in the abdomen. This sideways movement will help you with drop knees or heel hooks. The idea is to bring your right elbow to your left knee and then your left elbow to your right knee. This counts as 1 rep.
Credit: WorkoutLabs
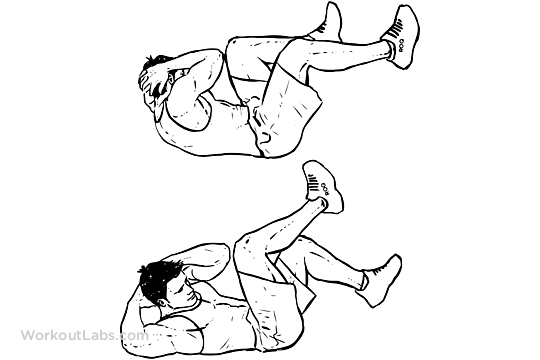
Excercise 4 –
A Jackknife Sit up may be the hardest ab exercise out there. It incorporates all the muscles in your core. The concept for this one is to lay flat on your back with your hands over your head and then pick your arms and legs up simultaneously. You should end up touches your hands to your shin area.

Credit: WorkoutLabs
The Goal
Since Abs are faster to recover than other muscles we will be hitting them every day of the workout. This workout will slowly ramp up over the 4 weeks. This is an exercise you can do at home so don’t make any excuses why you missed your core workout. Now let’s get shredded!
| Day 1 | Day 2 | Day 3 | Day 4 | |
| Week 1 | 3 Sets of 10 Hanging Leg Raises 1 min Plank |
3 Set of 10 Jackknife Sit-ups 2 sets of 50 Bicycles |
3 Sets of 10 Hanging Leg Raises 1 min Plank |
3 Set of 10 Jackknife Sit-ups 2 sets of 50 Bicycles |
| Week 2 | 3 Sets of 12 Hanging Leg Raises 2 min Plank |
3 Set of 12 Jackknife Sit-ups 2 sets of 50 Bicycles |
3 Sets of 12 Hanging Leg Raises 2 min Plank |
3 Set of 12 Jackknife Sit-ups 2 sets of 50 Bicycles |
| Week 3 | 3 Sets of 15 Hanging Leg Raises 2.5 min Plank |
3 Set of 15 Jackknife Sit-ups 3 sets of 50 Bicycles |
3 Sets of 15 Hanging Leg Raises 3 min Plank |
3 Set of 15 Jackknife Sit-ups 3 sets of 50 Bicycles |
| Week 4 | 3 Sets of 18 Hanging Leg Raises Plank to Failure |
3 Set of 18 Jackknife Sit-ups 3 sets of 60 Bicycles |
3 Sets of 20 Hanging Leg Raises Plank to Failure |
3 Set of 20 Jackknife Sit-ups 2 sets of 100 Bicycles |
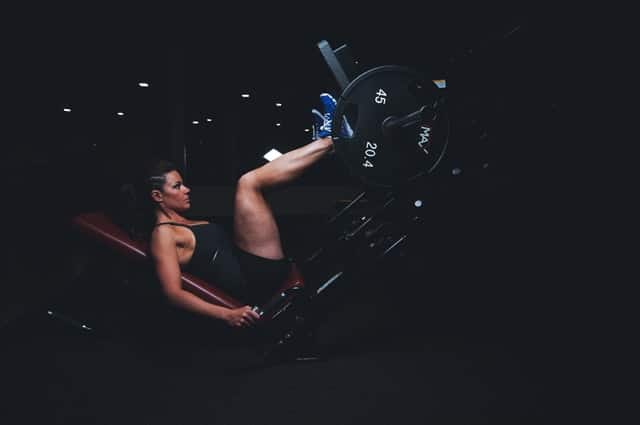
Strength Training Legs
Wait, you want us to train legs? Believe it or not, legs are one of the most important things when climbing. Footwork is often the reason you are unable to climb a problem or route. The key to training legs for climbing is twofold.
First, you must be able to avoid getting Elvis Legs. What is Elvis Leg you might ask? Well, think back to the last time you saw someone struggling really hard on a tall 5.9 about 3/4 of the way up. Did their legs start shaking uncontrollably? This is due to their legs becoming so fatigued that they start to shake. If you want to climb long routes you need to get your legs in shape along with the rest of your body.
Second, you must be able to explode to make dynamic moves. Think of this more in terms of a one rep max. This applies more to bouldering or harder Sport Climbing. To climb hard problems you need to be able to make hard dead point moves or all out dynos. Many people think that for these types of moves it all comes from your arms, but that’s not true, your legs are doing most of the work. For a true all-out dyno, the legs are what are propelling you upwards, whereas your arms are used more for guiding you and holding you into the wall. To send hard your legs have to be just as strong as your fingers.

Photo Credit: thenext28days
The Tools
Click the Following Links to See Recommendation for Home Workout Options
- A Bike (stationary or mobile)
- Weights (this can be your body weight, dumbbells, or a weight vest)
- Crutches (so you can walk after your first leg workout…)
The Workout
For this workout, we are focusing on both power and power endurance. We need to train our legs to be able to explode with as much force as possible and also not fatigue at less than 50 reps of strenuous activity. This will make sure you can count on your legs to do the hard moves and also get us to the top of a long route.
Workout 1 – Power Endurance
For this workout, we will be using a bike to put resistance on our legs. If you do not have access to a bike you can substitute a few flights of stairs for this workout. The drill will be intervals of 90% effort for 1 min and then 10% effort for 1 minute. In other words, either sprint, ride up a hill, or turn up the resistance for 1 min and give almost maximum effort and then take it easy for a minute. Your cadence (or pedal rpm) should be at around 50-60 reps per minute during the hard interval. You want your effort to sustain for the entire minute so if you can only exert that amount of effort for 10 seconds then dial it back a bit.

Workout 2 – Explosive Power
This workout will increase the explosive strength in your legs. For this exercise, you will be doing squat jumps. I could try to explain squat jumps, but I think this video really does a better job. You will want to do sets of 10 jumps of whatever variation you like. Only let yourself rest for 60-90 seconds in between sets to get the most effective muscle stimulation. Make sure to mix up your jumps to keep you fresh and motivated.
The Goal
The plan is to work out your legs 2 times a week. This will steady build up over the 4 week period. The first week may only take 7 or 8 minutes to complete, but as the training intensifies you will need to dedicate about 30 minutes to your leg workout. If the workout is too intense for you do as many sets/minutes as you can before failure. This will still be an extremely effective workout.
| Day 2 | Day 4 | |
| Week 1 | 4 Mins Interval Training
2 Set of 10 Squat Jumps |
6 Mins Interval Training
3 Set of 10 Squat Jumps |
| Week 2 | 10 Mins Interval Training
5 Set of 10 Squat Jumps |
12 Mins Interval Training
6 Set of 10 Squat Jumps |
| Week 3 | 16 Mins Interval Training
7 Set of 10 Squat Jumps |
18 Mins Interval Training
8 Set of 10 Squat Jumps |
| Week 4 | 20 Mins Interval Training
10 Set of 10 Squat Jumps |
20 Mins Interval Training
10 Set of 10 Squat Jumps |
Rest
After the four weeks of brutal training, your body will need some rest. Believe it or not, this is the more important section of the training guide. Without rest and recovery, your muscles and tendons will not be able to grow.
So I may have said this is a 4-week training plan at the beginning of this article, but it’s actually a 5-week plan. Don’t worry though, this one is easy.
The Tools
- A TV
- A Netflix Subscription
- A Couch
- Lots of (Good) Food
The Workout
Kick back and chill. It’s time to binge-watch Netflix and get plenty of good nutrition for your body. Walks, foam rolling, and stretching are good ways to help promote recovery. Easy right?
The Goal
Come back after week 5 ready to crush. Make sure you ease into your first couple sessions back in the gym. Your body will need to readjust to the loads after the week of rest. By your third session back you won’t believe the results! Your projects will be falling left and right.
Enjoy crushing for a while until you want to up your game again and then start again at square one, only this time kick it up a notch!
If you are looking for another training regimen download our Exclusive PDF Training Guide.
Comment below with your thoughts and experiences!
Owner and Operator of Every Last Rock. He is dedicated to spreading the Stoke about all things climbing. Often found Bouldering around the US and obsessively training.